Getting Started with NETPIE

Managing your application

Programming your thing

MQTT

HTTP REST API

Managing your account


NETPIE is a cloud platform for IoT solution development. NETPIE lets you connect everything seamlessly and takes care of all tedious work, like infrastructure administration, so you can spend time on your innovative IoT applications.

NETPIE is not managed MQTT brokers. We created our own publish-subscribe communication model that allows instant messaging among IoT devices (aka "things"). This communication model can support both the MQTT protocol and the HTTP REST protocol. To make things talk over the MQTT protocol, you would need help from NETPIE libraries (aka "Microgears"). Our Microgears are open-source and available on github.

Managing your application

1. Sign up or Log in to your user account at netpie.io.

2. Navigate to the RESOURCES >> APPLICATIONS page.

3. Create a new application ID. Think of this application ID as your project's name. The application ID must be a unique name since it will uniquely identify your project within NETPIE. It is case-sensitive and cannot contain special characters. For example, "JaneSmartHome" or "PaulSmartFarm."

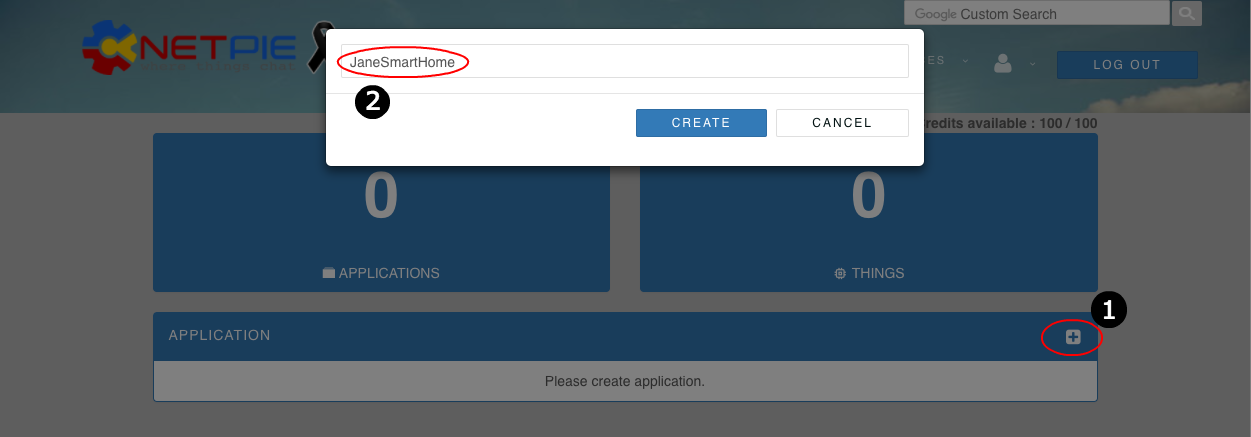
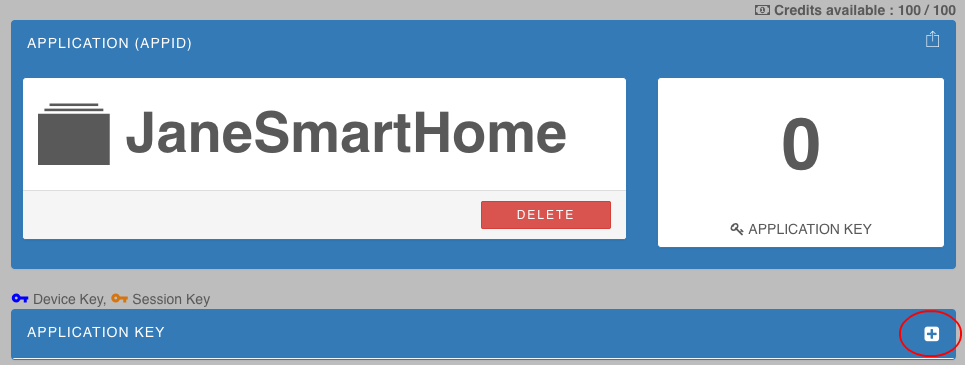
4. Under the newly created application, create a new application key.

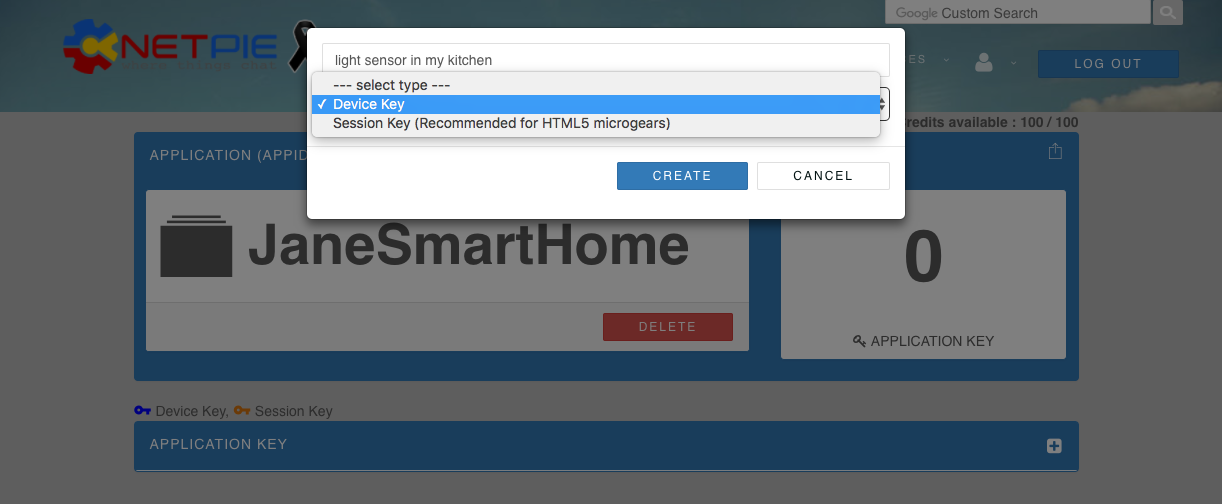
4.1 Give it a name. This application key name is a description of your "things" so you will know what you are managing. It can contain white space or special characters. It does not have to be unique. For example, "a light sensor in my kitchen" or "a lamp in my bedroom."

4.2 Choose your key type. Device Key can be used on anything. This key has no lifetime. Session Key, on the other hand, will expire after a device disconnects from the platform. The Session Key is more suitable with the HTML5 Microgear or any Microgear on a device that you do not expect it to have a permanent connectivity. For example, a browser running HTML5 web page to monitor a sensor should use a Session Key.

Note that: for both key types, more than one thing can share the same application key. It is up to your design. However, please keep in mind that individual key assignment is always more secure than key-sharing.

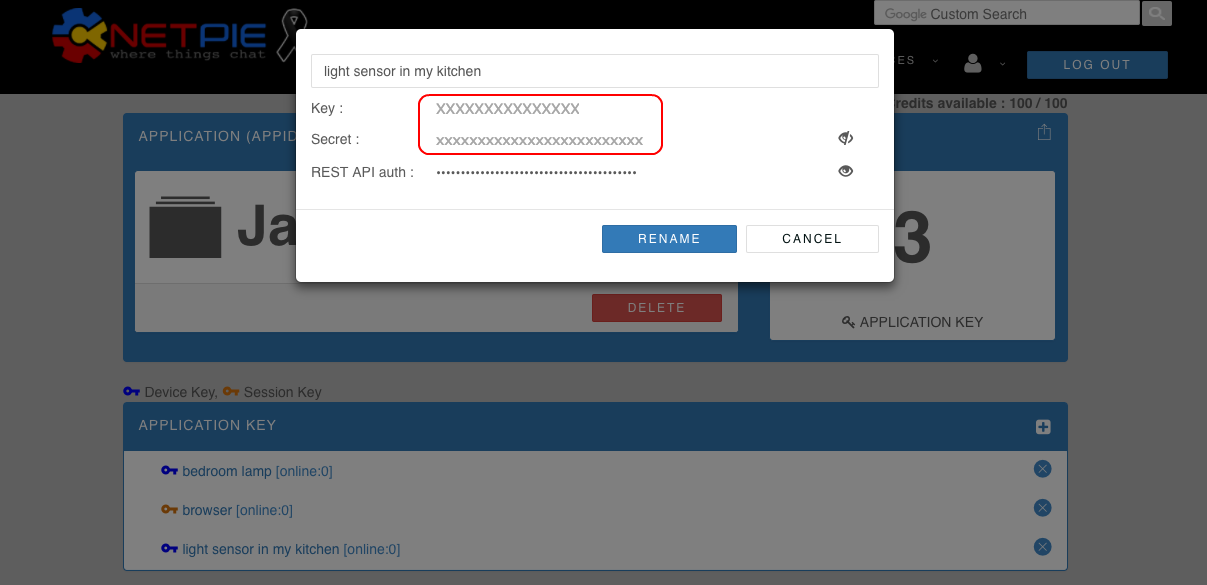
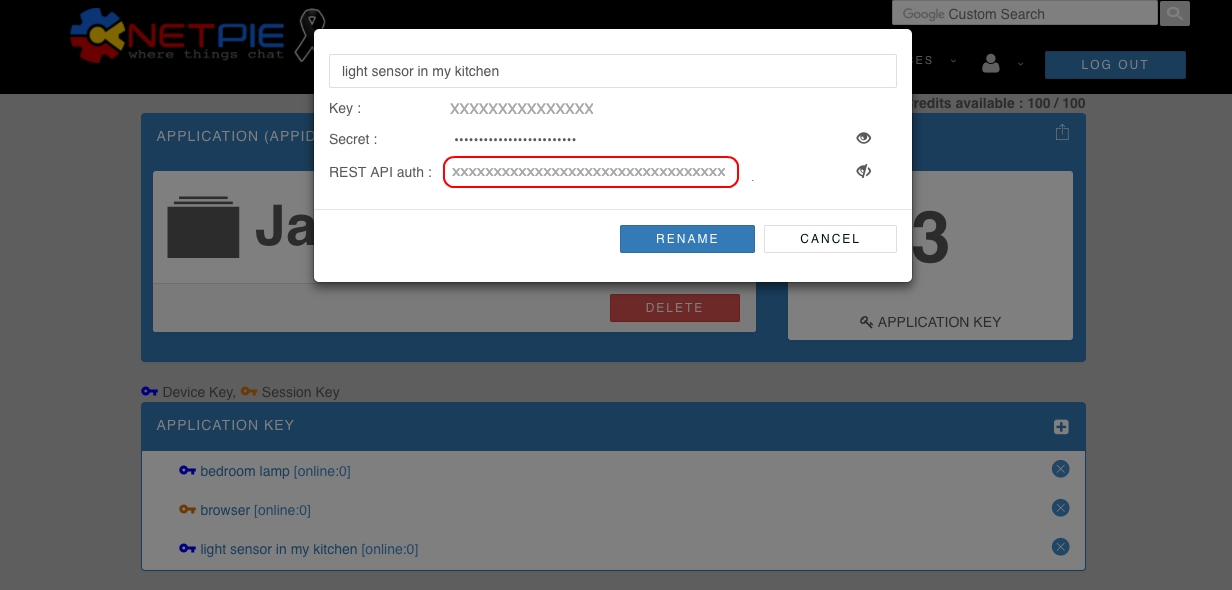
5. Click on the newly created application key to obtain the Key and Secret.

Programming your thing

Do you want your thing to communicate over MQTT or HTTP REST?

For MQTT go here

For HTTP REST go here

MQTT

1. Download Microgears for hardware or operating systems of your choice from github.

2. Find the example code folder. Find the following lines. (They are different in different types of Microgears.)

For example, in node.js Microgear,

In Arduino Microgear,

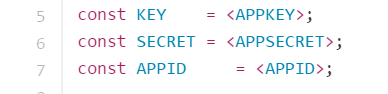
3. Edit the KEY, SECRET and APPID fields according to what you have created on the NETPIE web. All variables should have the string markers "". For example, to program your light sensor in the kitchen, you would use.

const KEY = "8tXaCrT4F3pJQc0"
const SECRET = "IV9PVi4mjEUoZWDvH0CkoazCi"
const APPID = "JaneSmartHome"

HTTP REST API

1. See the REST API manual here.

2. The REST API uses the KEY and SECRET which you have created on the NETPIE web for authentication. The REST API auth field has this format Key:Secret.

Managing your account

We use your email address and your mobile phone number to identify your account. First-time password and password recovery will be sent by SMS to your mobile phone number. If you have problems receiving SMS, please contact us.

Sign up

Sign up for a new account is free. Please provide us a unique email address, your name, your organization, and your mobile phone number. The first-time password will be sent by SMS to your mobile phone number. We currently support international mobile numbers. If you have problems receiving SMS, please contact us. We may occasionally email you regarding changes in the service, terms, and policy.

Change Password

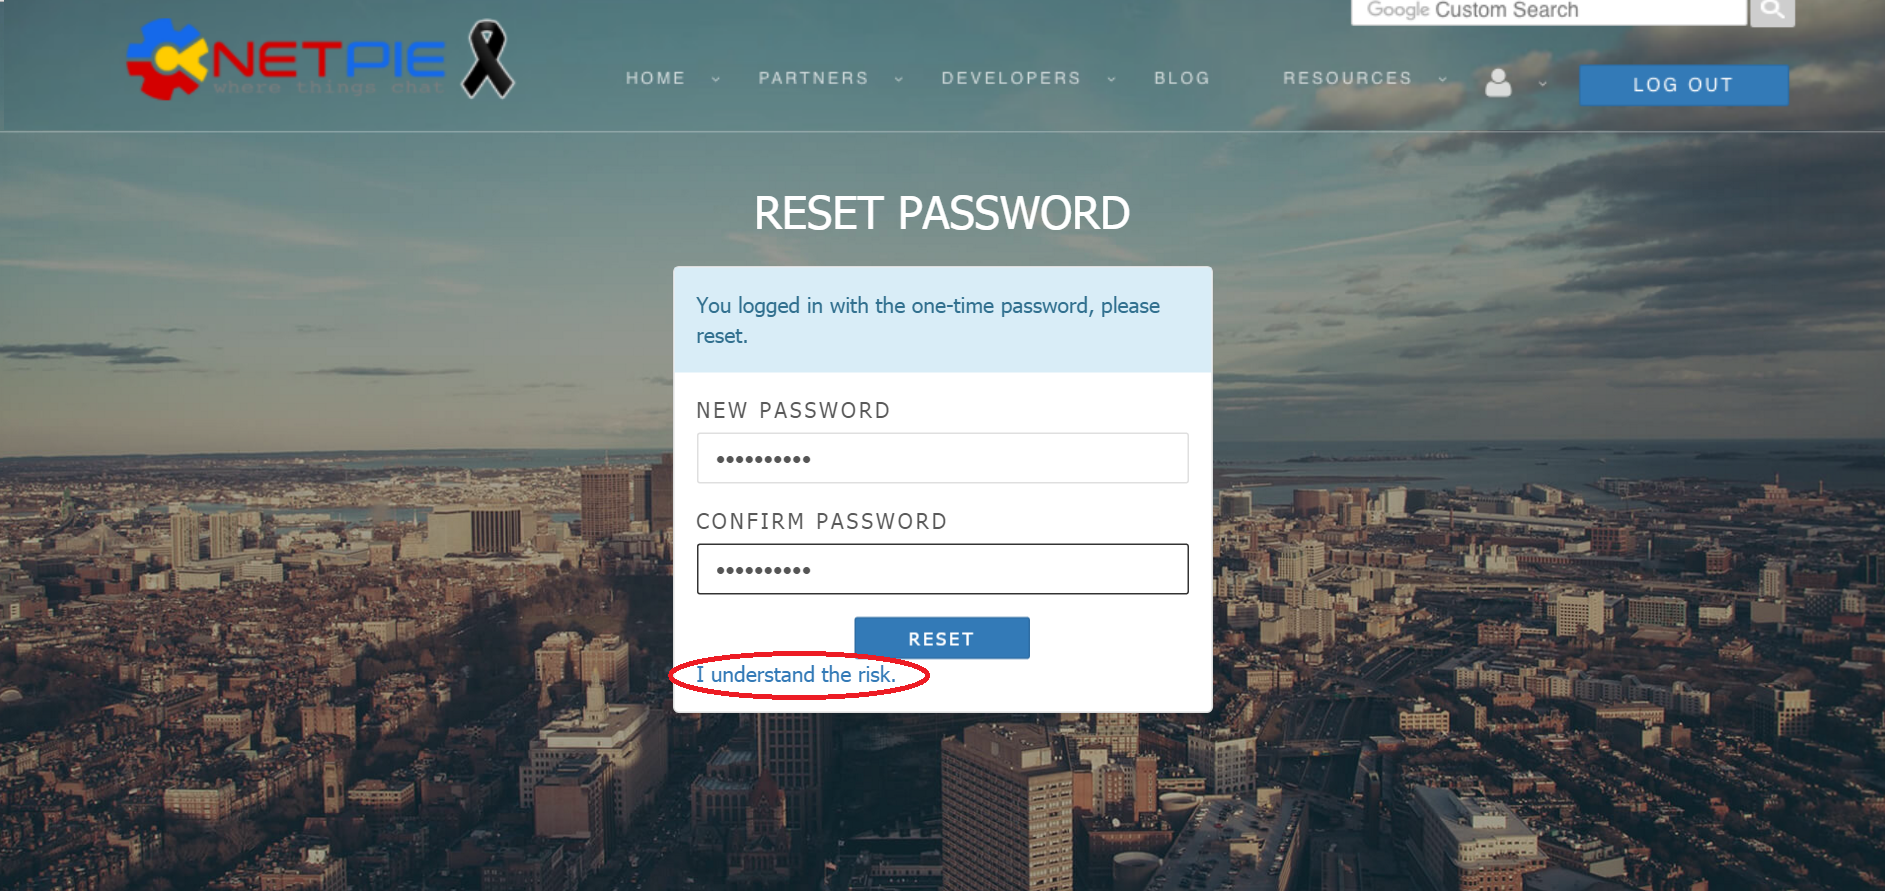
If you log in to NETPIE for the first time with the password you receive via SMS, the service will ask you to change this password to the password of your choice. If can skip this step by clicking on "I understand the risk." However, the next time you log in, you will be asked to change your password again. We do this to remind you that security of your account lies in your own strong and secret password.

You can also change your password anytime by logging in to NETPIE and find the CHANGE PASSWORD menu under your account information.
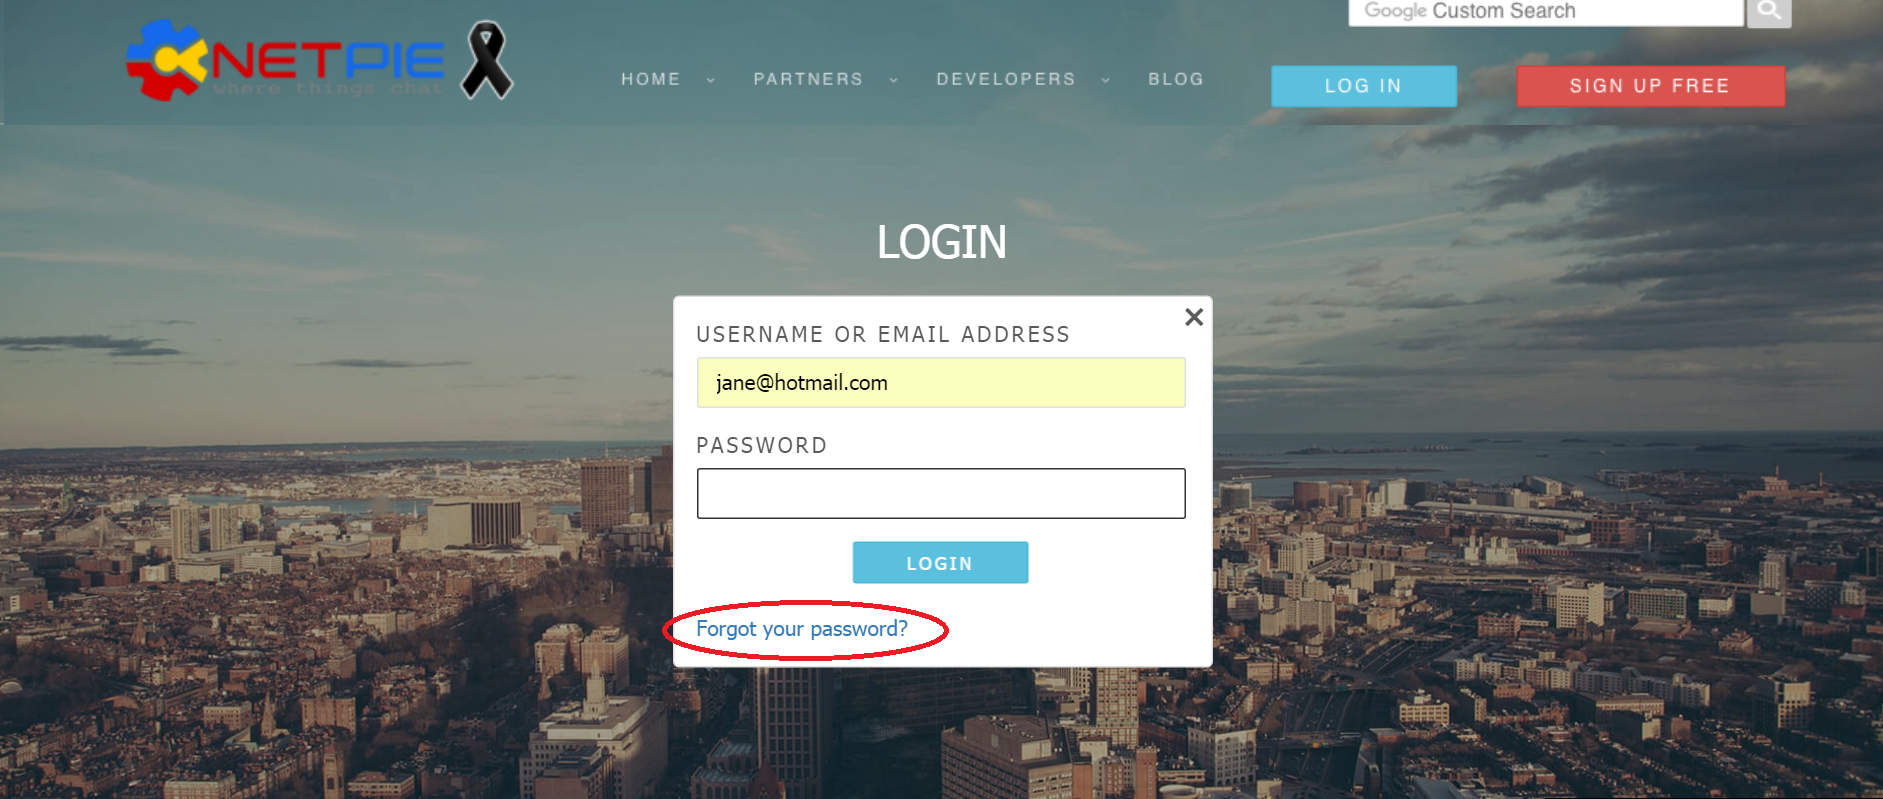
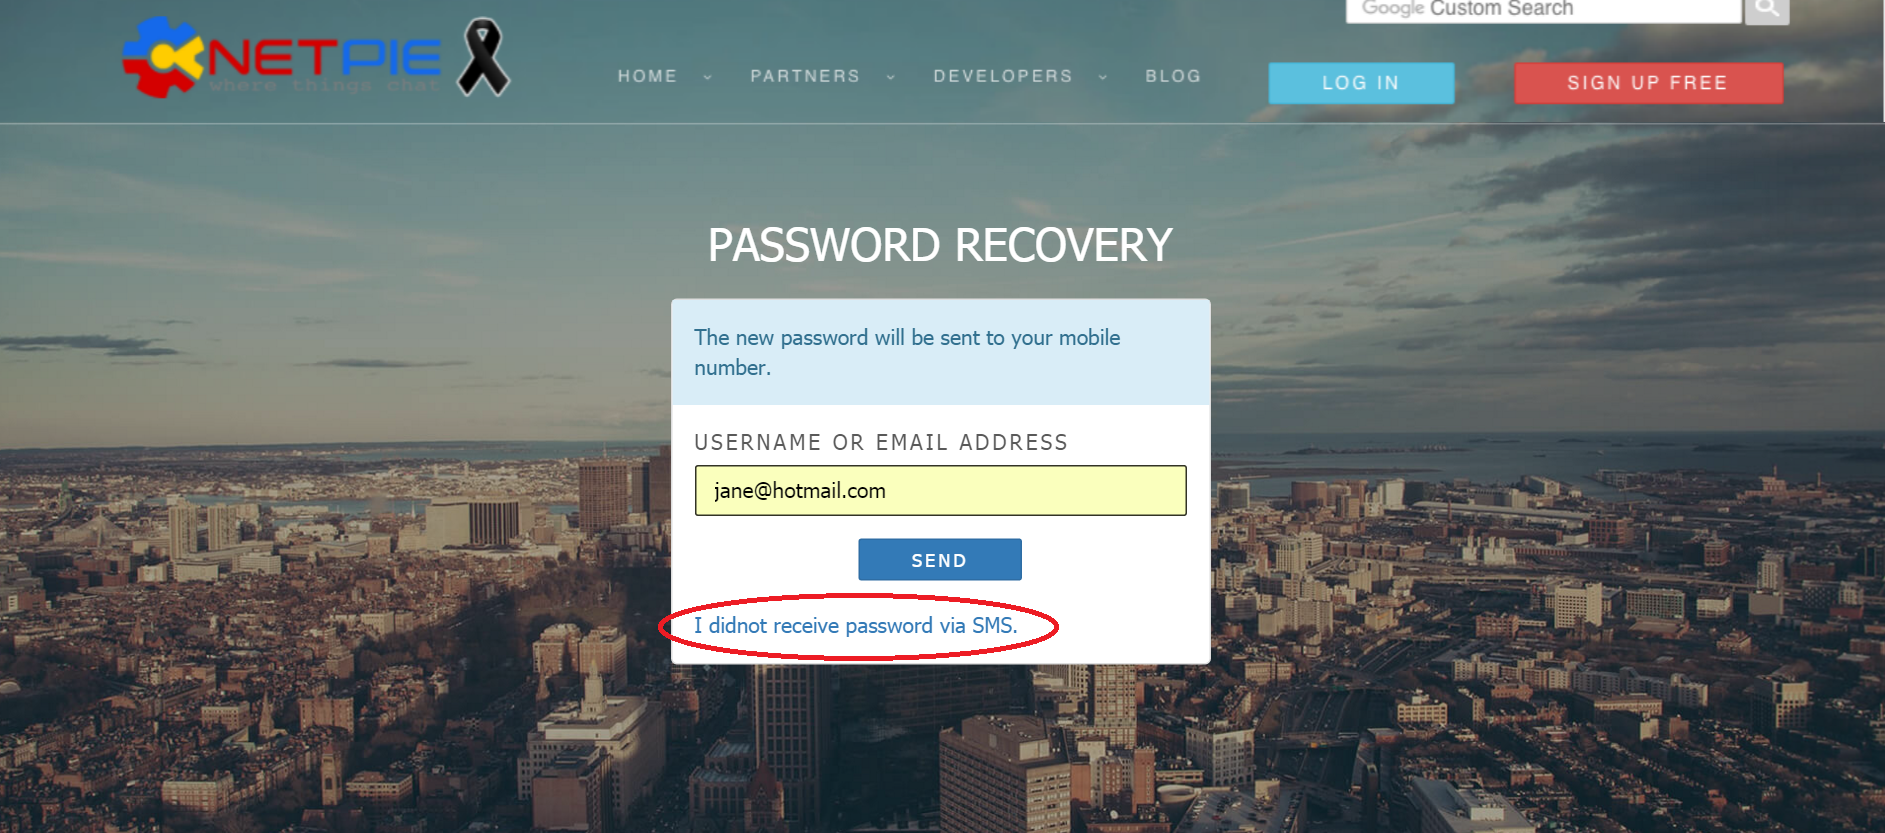
Password Recovery

In case you have forgotten your password, we will send your new password to the mobile phone number registered with your account. If you have problems receiving SMS, please contact us.

Still have questions?

Don't hesitate to contact us if you got any questions.

เริ่มใช้งาน NETPIE

การจัดการ Application

การสร้างช่องทางการสื่อสารให้อุปกรณ์หรือ Things ของคุณ

สำหรับโปรโตคอล MQTT

สำหรับโปรโตคอล HTTP REST

การจัดการบัญชีผู้ใช้


NETPIE เป็นแพลตฟอร์มบริการสำหรับการพัฒนา IoT Solution ซึ่งสามารถทำให้คุณสามารถเชื่อมต่อสิ่งต่างๆได้อย่างง่ายดาย และไร้ความกังวลในเรื่องต่างๆ เช่น การบริหารจัดการการเชื่อมต่อ การยืนยันตัวตนผู้ใช้และสิ่งของ การจำกัดการเข้าถึงบริการ และเรื่องเกี่ยวกับ system admin ทั่วไป ดังนั้นคุณสามารถทุ่มเทเวลาที่เหลือเพื่อสร้างสรรค์ผลิตภัณฑ์ IoT ได้อย่างเต็มที่

NETPIE ไม่ใช่แค่ MQTT broker แต่เราสร้างการสื่อสารแบบ publish-subscribe ในรูปแบบเฉพาะที่ทำให้อุปกรณ์ IoT หรือ “Things” สามารถติดต่อสื่อสารโต้ตอบกันได้อย่างเสรี การสื่อสารแบบนี้สามารถรองรับได้ทั้งโปรโตคอล MQTT และ HTTP REST การสร้างให้ “Things” สามารถสื่อสารกันได้ด้วยโปรโตคอล MQTT คุณเพียงแค่ใช้ library ของ NETPIE ที่เรียกกันว่า Microgears ในการเชื่อมต่อ ซึ่ง Microgears เหล่านี้เป็น open-source ที่สามารถดาวน์โหลดได้ฟรีที่ github.

การจัดการ Application

1. Log in บัญชีผู้ใช้ที่ netpie.io (หากยังไม่มีบัญชีผู้ใช้ ให้ลงทะเบียนก่อน)

2. ไปที่ menu RESOURCES >> APPLICATIONS

3. สร้าง Application ID (คลิกที่เครื่องหมาย + เพื่อสร้าง ID) ซึ่ง ID นี้เปรียบเสมือนชื่อของ project ที่คุณพัฒนาอยู่ จะต้องเป็นชื่อที่ไม่ซ้ำภายใต้บัญชี NETPIE ของคุณ โดยชื่อนั้น case-sensitive และไม่ประกอบด้วยตัวอักขระพิเศษ เช่น "JaneSmartHome" หรือ "PaulSmartFarm" เป็นต้น

4. ในแต่ละ Application คุณสามารถสร้าง Application Key

4.1 ตั้งชื่อ Application key ของคุณ ซึ่งอาจจะเป็นคำบรรยายที่สื่อถึง Thing ของคุณ สามารถมี ช่องว่าง (white space) หรืออักขระพิเศษได้ และชื่อสามารถซ้ำได้ เช่น "a light sensor in my kitchen" หรือ "a lamp in my bedroom"

4.2 เลือกชนิดของ key ในชนิดแรกคือ Device Key นั้น สามารถใช้ได้กับอุปกรณ์หรือ application ทั่วๆไป ส่วนชนิดที่สองที่เรียกว่า Session Key นั้นเราแนะนำให้คุณเลือกใช้กับ application ที่ใช้ HTML5 Microgear เช่น Browser ที่ run HTML5 บนหน้าเว็บสำหรับ monitor อุปกรณ์เซนเซอร์ จะเหมาะสมกว่า (เนื่องจากกระบวนการของการจัดการ key ที่แตกต่างกัน)

หมายเหตุ: สำหรับ key ทั้งสองประเภทนั้น อุปกรณ์หรือ Things สองชิ้นขึ้นไปสามารถร่วมใช้ Application Key เดียวกันได้ ซึ่งขึ้นอยู่กับการออกแบบของคุณ แต่ขอให้ตะหนักว่าความปลอดภัยในการใช้งานสำหรับการใช้ Key แยกสำหรับอุปกรณ์แต่ละอันจะมากกว่ากว่าการใช้ Key ที่แชร์ร่วมกัน

5. คลิกที่ Application Key ที่สร้างขึ้นมาใหม่เพื่อนำเอา Key และ Secret มาใช้

การสร้างช่องทางการสื่อสารให้อุปกรณ์หรือ Thing ของคุณ

คุณต้องการให้ "Things" ของคุณติดต่อสื่อสารกันด้วย MQTT หรือ HTTP REST?

สำหรับ MQTT ดูตัวอย่าง ที่นี่

สำหรับ HTTP REST ดูตัวอย่าง ที่นี่

MQTT

1. ดาวน์โหลด Microgears สำหรับฮาร์ดแวร์หรือระบบปฏิบัติการที่คุณเลือกจาก github.

2. ดูตัวอย่าง code จากแฟ้ม หาบรรทัดที่ต้องใส่ AppID, Secret, Key เหล่านี้ซึ่งอาจแตกต่างไปตามแต่ละชนิดของ Microgear

ตัวอย่างของ Microgear ที่เขียนในรูปแบบของ node.js

ตัวอย่างของ Microgear สำหรับ Arduino

3. ตรงส่วนของ KEY, SECRET และ APPID แก้ไขโดยใส่ข้อมูลที่คุณได้สร้างไว้จากเว็บ NETPIE ซึ่งตัวแปรทั้งหลายเหล่านี้ต้องมีเตรื่องหมาย quatation " " ด้วย ตัวอย่างเช่น การพัฒนา program Light sensor in the kitchen ใน application Smart home รูปแบบการ define จะเป็นเช่นนี้

const KEY = "8tXaCrT4F3pJQc0" const SECRET = "IV9PVi4mjEUoZWDvH0CkoazCi" const APPID = "JaneSmartHome"

HTTP REST API

1. กรุณาอ่านคู่มือ REST API ที่นี่

2. REST API ใช้ KEY and SECRET ที่คุณสร้างที่เว็บ NETPIE สำหรับการยืนยันตัวตน (Authentication) ซึ่งจะมีรูปแบบเฉพาะของ REST API auth field คือ Key:Secret

การจัดการบัญชีผู้ใช้

คุณสามารถ Sign up ลงทะเบียนสร้างบัญชีฟรี

กรุณาให้ข้อมูลอีเมล ชื่อ และสถานที่ทำงาน/บริษัท และหมายเลขโทรศัพท์เคลื่อนที่ของคุณสำหรับการติดต่อผ่านทาง SMS ซึ่งในปัจจุบันระบบสามารถรองรับหมายเลขโทรศัพท์เคลื่อนที่จากต่างประเทศด้วย

เราใช้อีเมลของคุณและหมายเลขโทรศัพท์เคลื่อนที่ในการระบุบัญชีของคุณ ในครั้งแรกที่คุณเริ่มใช้งาน password และ การกู้คืน (password recovery) จะถูกส่งไปถึงคุณด้วย SMS ที่หมายเลขที่คุณลงทะเบียนไว้ หากคุณมีปัญหาเนื่องจากไม่ได้รับข้อมูล password ผ่านทาง SMS กรุณาติดต่อ ที่นี่

ในอนาคตหากมีการเปลี่ยนแปลงในเรื่องการบริการและนโยบายต่าง ๆ เราจะส่งอีเมลหรือ SMS ไปแจ้งผู้ใช้งาน

การเปลี่ยน Password

ในกรณีที่คุณเข้าใช้บัญชี NETPIE ครั้งแรก คุณจะได้รับ password ทาง SMS, เราจะถามคุณให้เปลี่ยนแปลง password ตามที่คุณต้องการ คุณสามารถข้ามขั้นตอนนี้ด้วยการคลิก "I understand the risk."

แต่อย่างไรก็ตาม ในการเข้าใช้บัญชีในครั้งถัดไป ระบบจะถามคุณให้เปลี่ยน password อีกครั้ง เราแจ้งเตือนเช่นนี้เพื่อให้คุณตระหนักถึงการรักษาความปลอดภัยซึ่งขึ้นอยู่กับ password ที่คุณเลือกใช้

คุณสามารถเปลี่ยน password ได้ทุกเมื่อที่ log in เข้าสู่ระบบ โดยคลิกที่ CHANGE PASSWORD ใน เมนูส่วนตัวด้านบน

การกู้คืน Password

ในกรณีที่คุณลืม password เราจะส่ง password ใหม่ทาง SMS ไปยังหมายเลขโทรศัพท์เคลื่อนที่ที่คุณได้ลงทะเบียนไว้ หากคุณมีปัญหาเนื่องจากไม่ได้รับข้อมูล password ผ่านทาง SMS กรุณาติดต่อ ที่นี่

หากคุณมีคำถามกรุณา ติดต่อเรา